Credits and sources
Microsoft Learn
https://learn.microsoft.com/en-us/azure/virtual-machines/windows/build-image-with-packerHashicorp
Intro
This article is about automating image builds in Azure. I am using Packer in this scenario and will use a Windows image for the examples. Linux builds use the same process. The goal is to make a customized image in Azure and place it in the Azure Compute Gallery for use with either AVD or Scale Sets.
I will walk through the process of using Packer on my machine and then move the process into GitHub Action for an automated build.
You should know how to use Terraform; if not, you can check out this blog series I made previously.
Getting started with Azure and Terraform - Part 1
Link to source code
The code for this blog post is on my GitHub. Follow the link below to find it.
https://github.com/mracket/Automated-Image-Build
Create Azure Compute Gallery
The first thing I will do is create an Azure Compute Gallery. Since I don’t use the portal often, I will do this with Terraform. Below is the code needed to create this resource.
The main.tf file contains the resources I am deploying. I am creating an Azure App Registration and outputting the client ID and password. Remember, you should never export your password in clear text, but I wanted to include this in the demo. The code enables you to create the same environment I have now easily.
main.tf:
resource "azurerm_resource_group" "main" {
  name     = var.resource_group_name
  location = var.location
  tags     = local.tags
}
resource "azurerm_shared_image_gallery" "main" {
  name                = var.gallery_name
  resource_group_name = azurerm_resource_group.main.name
  location            = azurerm_resource_group.main.location
  tags                = local.tags
}
resource "azurerm_shared_image" "main" {
  name                = "w11_demo"
  gallery_name        = azurerm_shared_image_gallery.main.name
  resource_group_name = azurerm_resource_group.main.name
  location            = azurerm_resource_group.main.location
  os_type             = "Windows"
  hyper_v_generation  = "V2"

  identifier {
    publisher = "microsoftwindowsdesktop"
    offer     = "office-365"
    sku       = "win11-23h2-avd-m365"
  }
}
resource "azuread_application" "main" {
  display_name            = "SP-GitHub-Automated-Image-Build-Demo"
  sign_in_audience        = "AzureADMyOrg"
  prevent_duplicate_names = true
}
resource "azuread_service_principal" "main" {
  client_id = azuread_application.main.client_id
}
resource "azurerm_role_assignment" "main" {
  scope                            = azurerm_resource_group.main.id
  role_definition_name             = "Contributor"
  principal_id                     = azuread_service_principal.main.id
  skip_service_principal_aad_check = true
}
resource "azuread_application_password" "main" {
  application_id = azuread_application.main.id
}
output "client_id" {
  value = azuread_application.main.client_id
}
output "password" {
  value = nonsensitive(azuread_application_password.main.value)
}
terraform.tf
provider "azurerm" {
  features {}
}
variables.tf
variable "resource_group_name" {
  description = "The name of the resource group in which the resources will be created."
  default     = "rg-automated-image-build"
}
variable "location" {
  description = "The Azure region in which the resources will be created."
  default     = "WestEurope"
}
variable "gallery_name" {
  description = "The name of the gallery."
  default     = "gal_automated_image_build"
}
locals.tf
locals {
  tags = {
    Environment = "Production"
    Owner       = "Martin"
  }
}
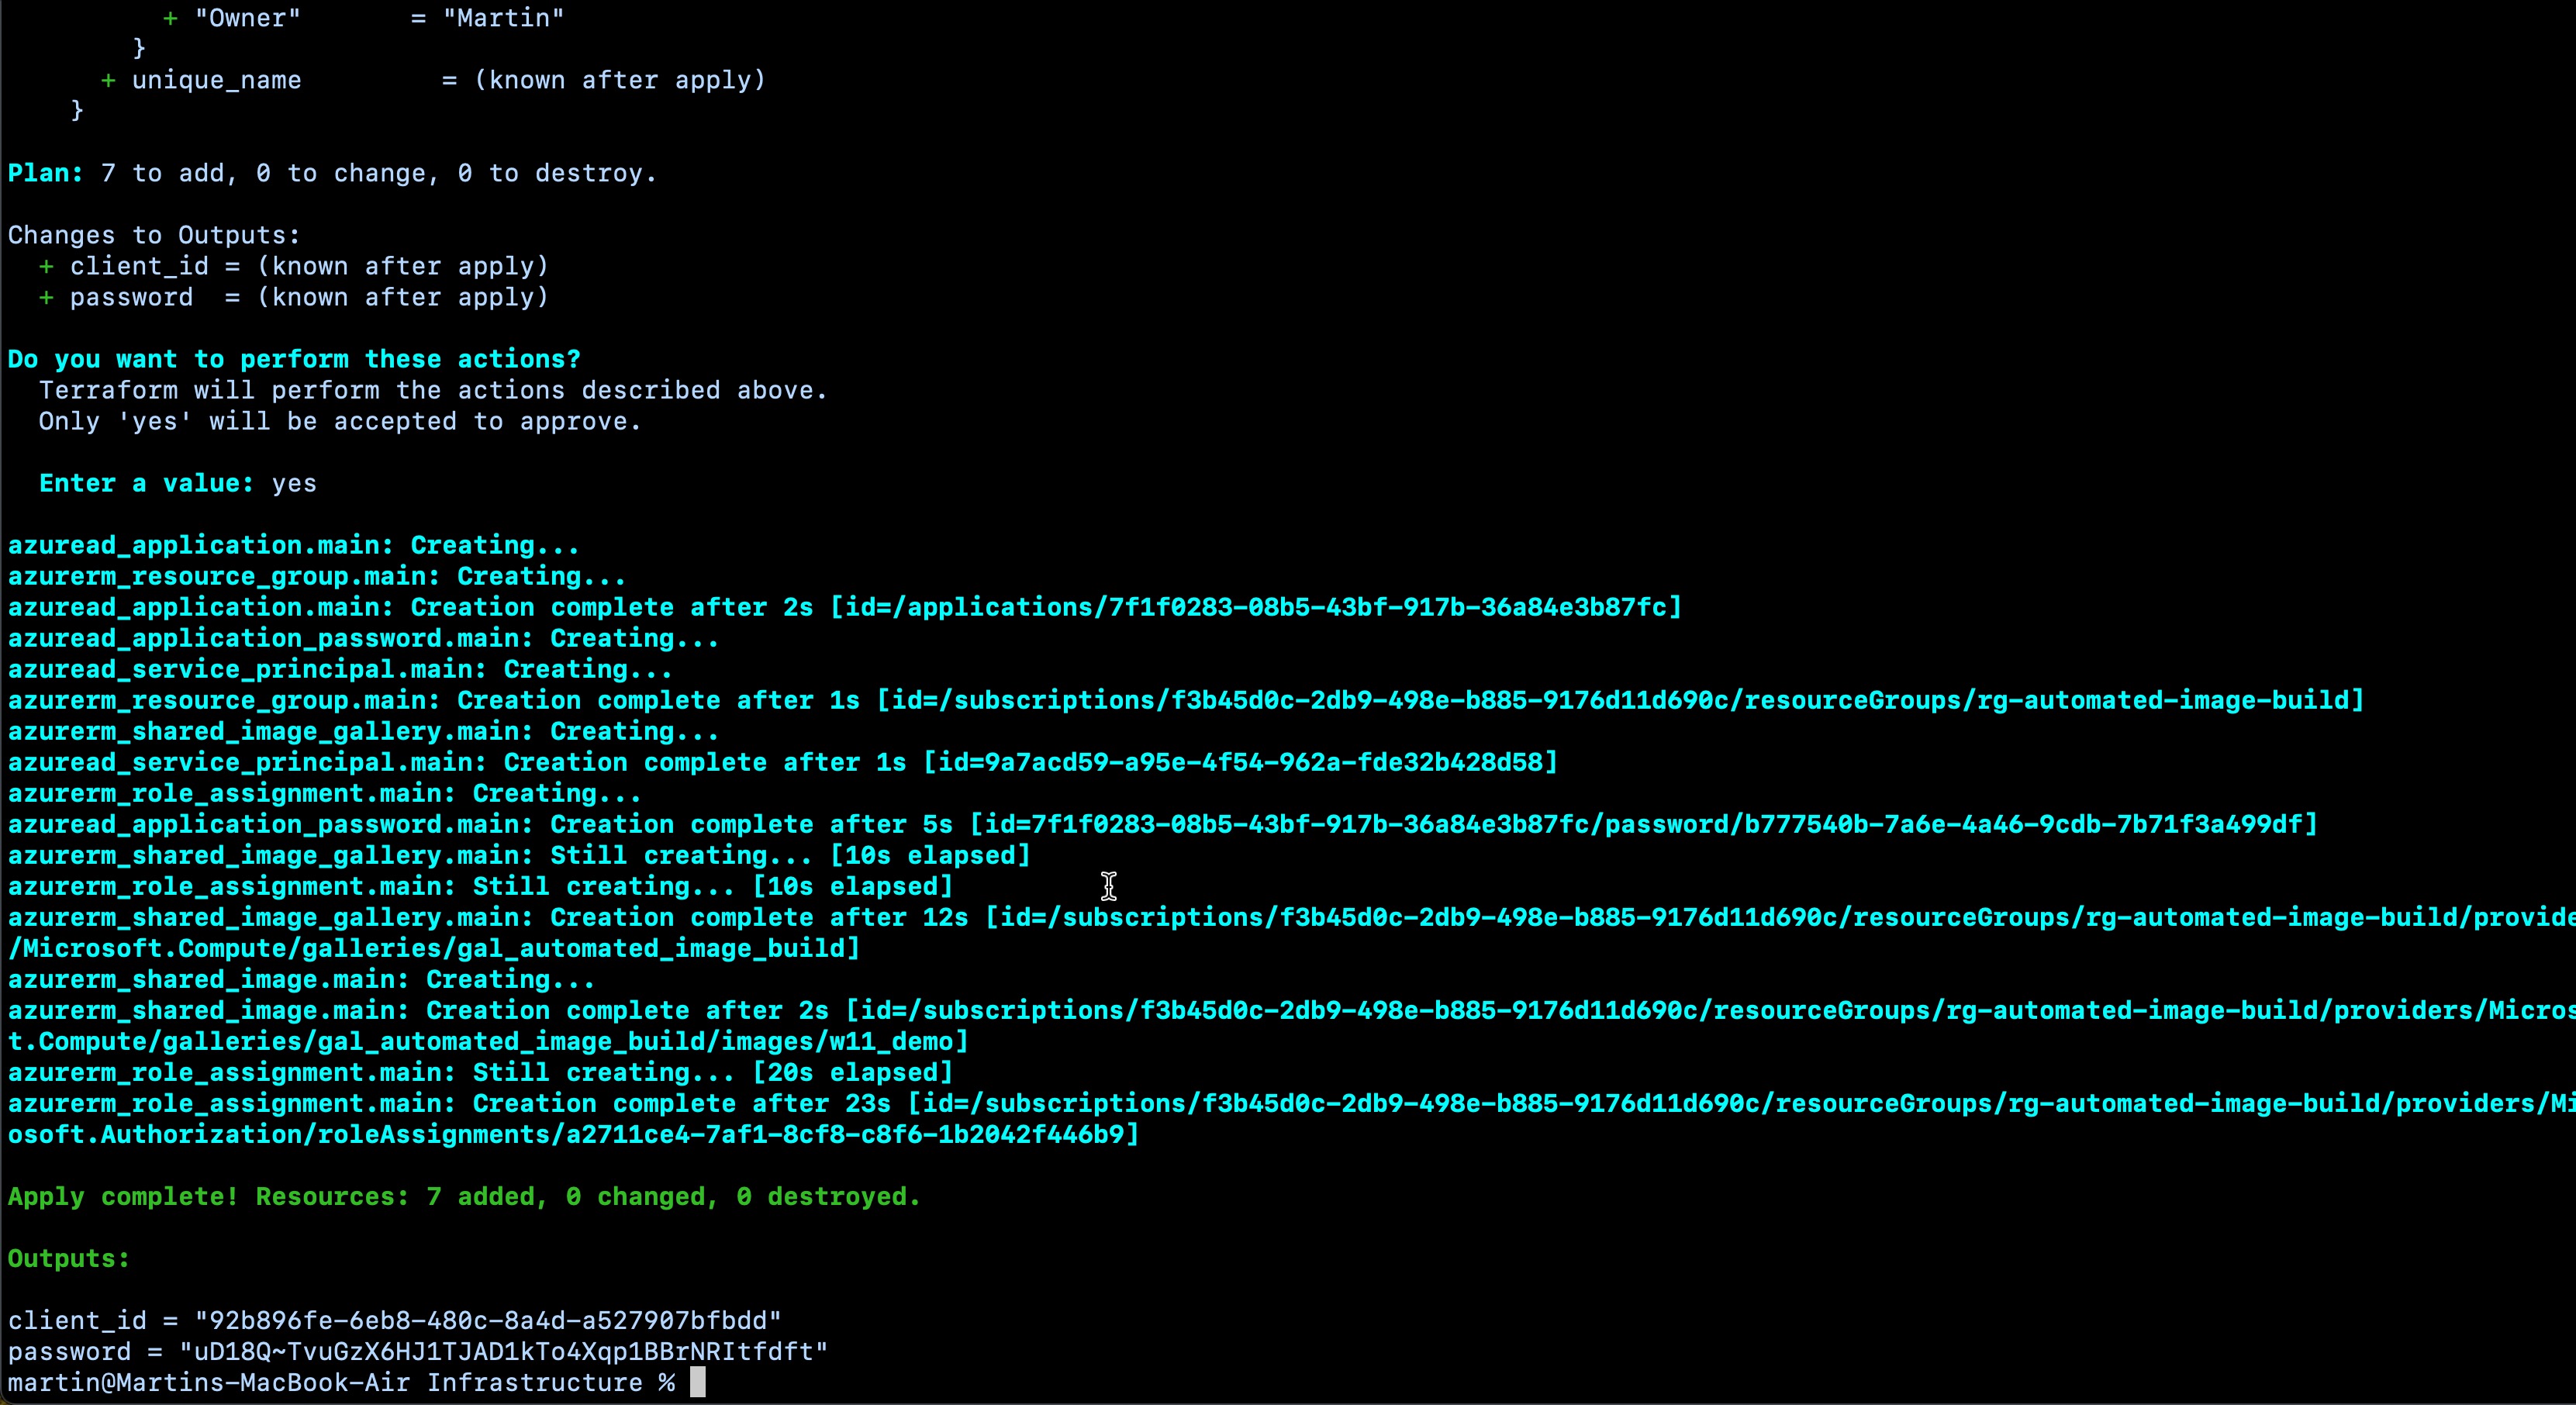
The screenshot below shows the output of the “terraform apply” command I ran. The client ID and secret are unimportant; they are deleted from my environment when this post is published.
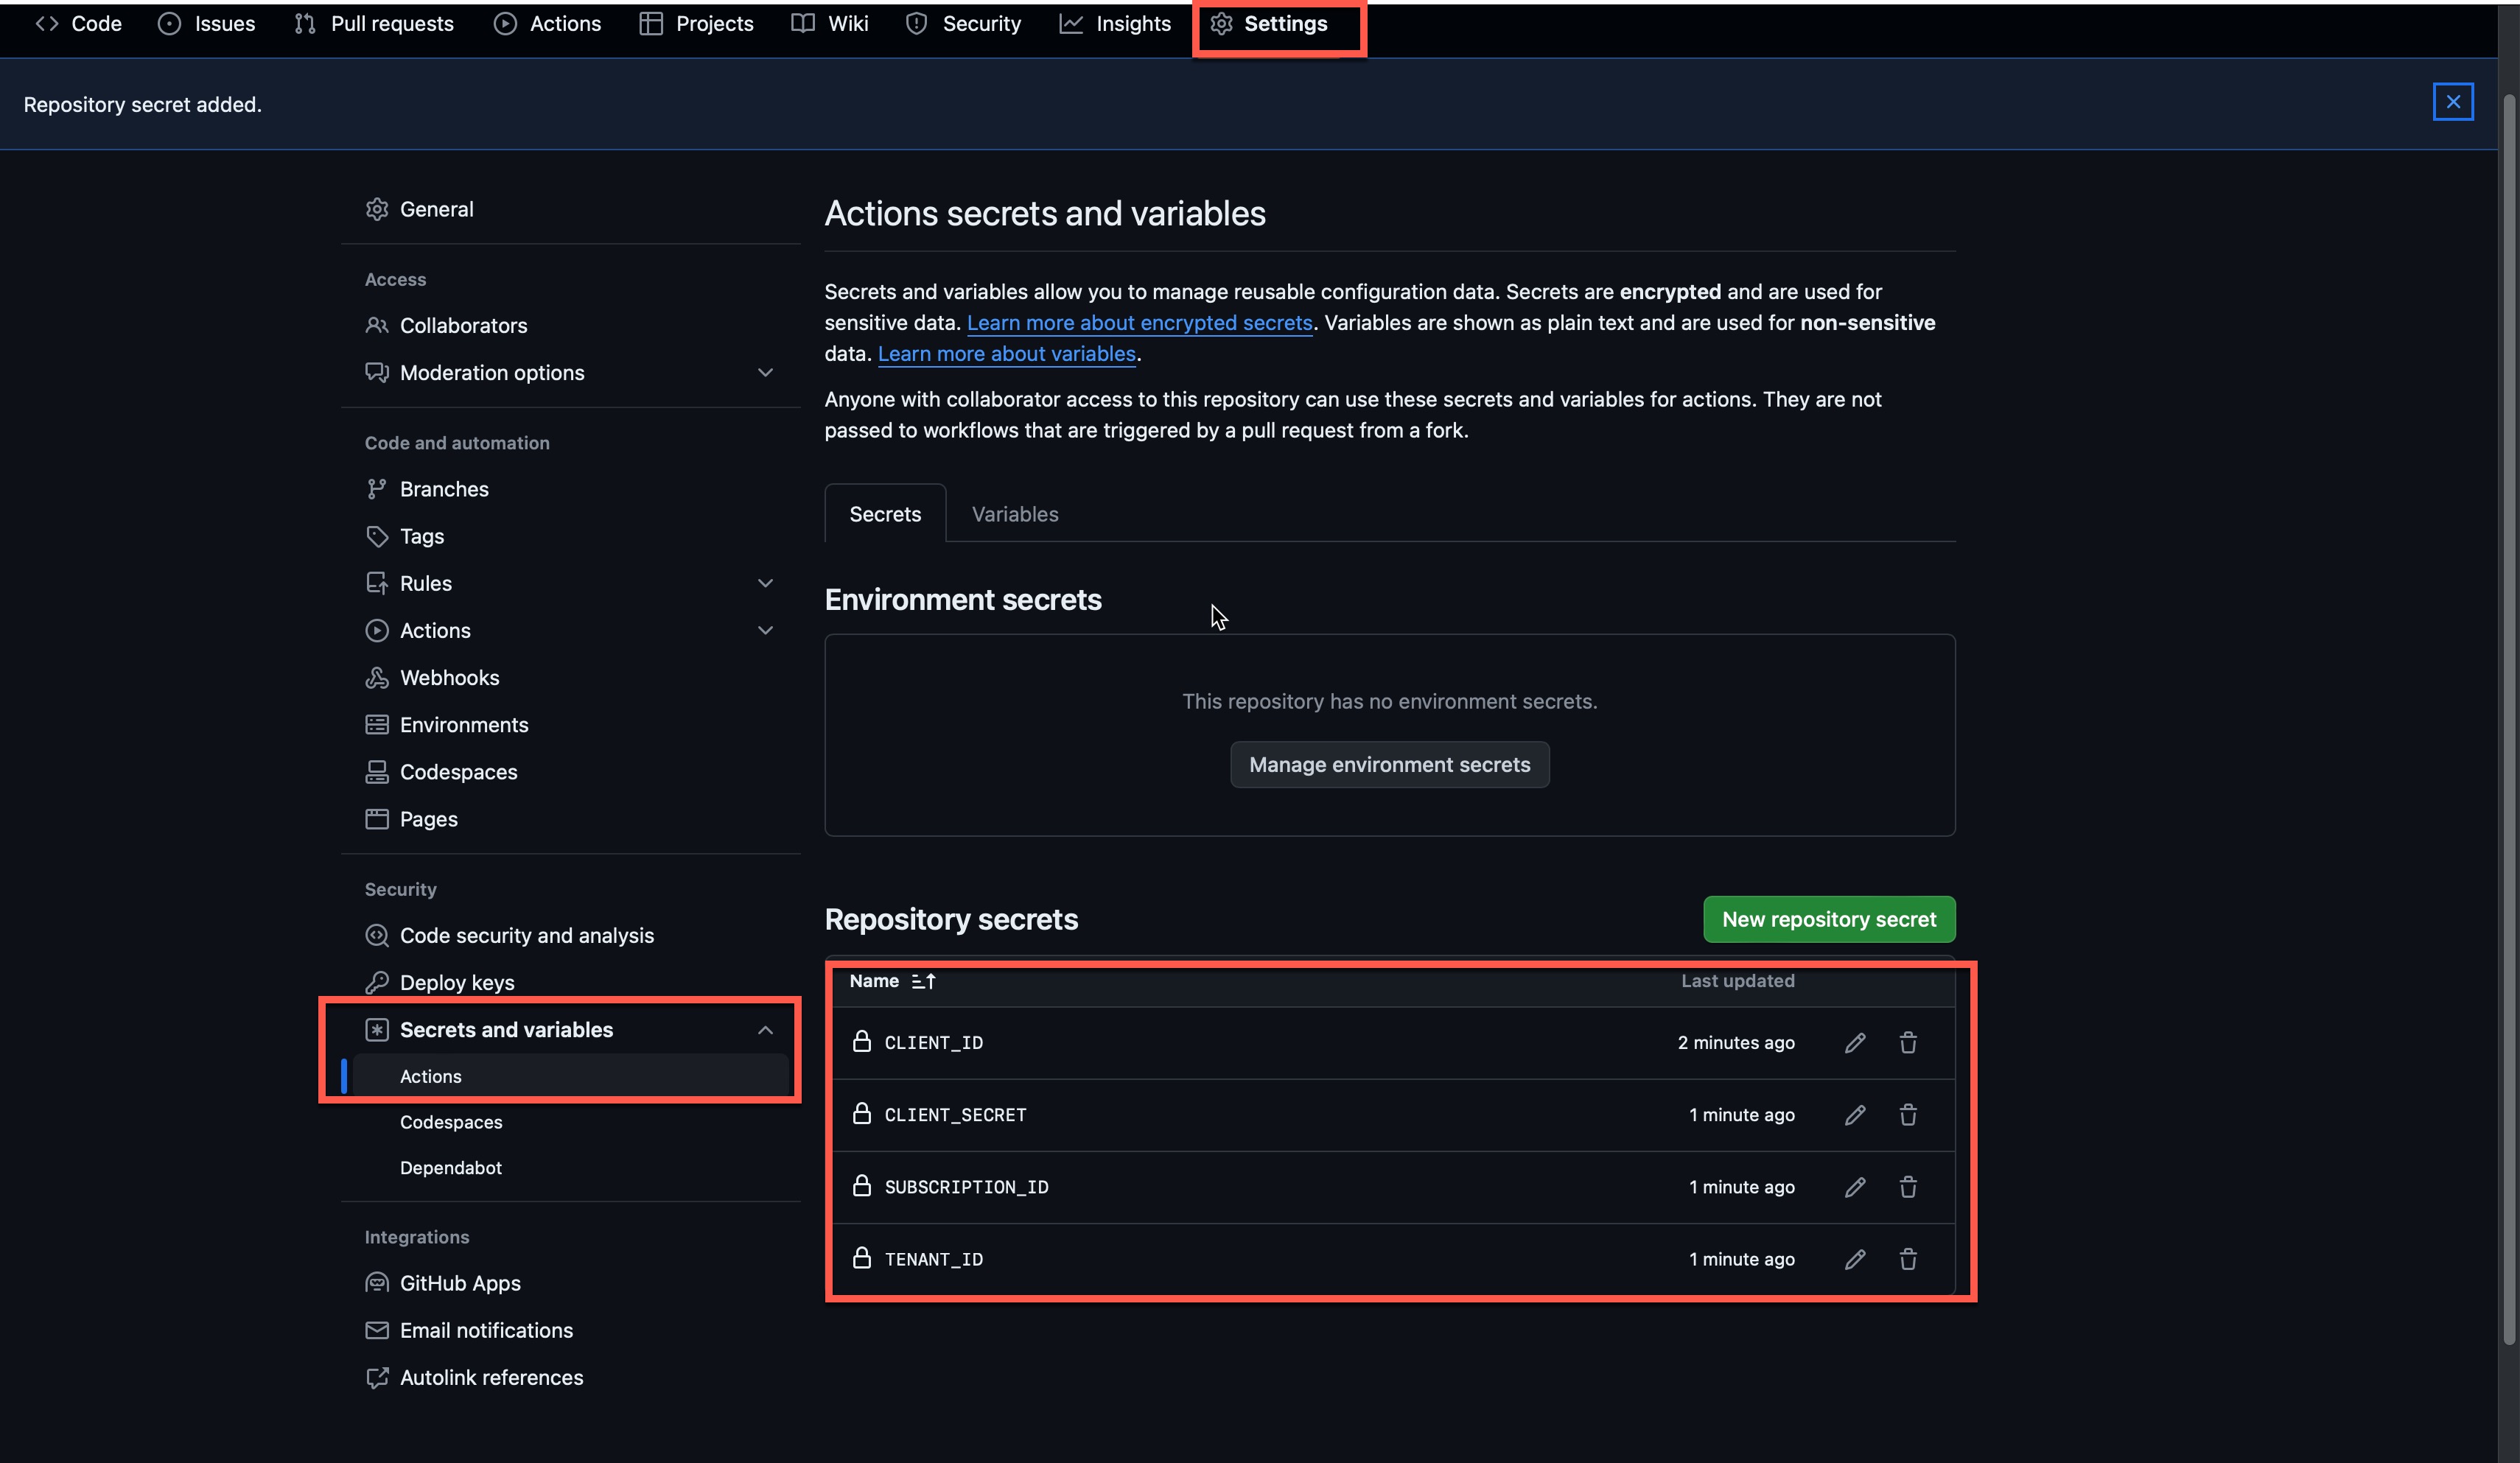
GitHub secrets
I created the following secrets to support the GitHub Action. The client ID and secrets are the output from the Terraform command, and I expect you already know the subscription and tenant ID.
Packer template
The next part is creating the Packer template. There are two options for writing these templates: one in JSON format and the other in HCL format. I have chosen the HCL format because I prefer the syntax in this format. I will briefly break down the code and explain what each part is.
The first file I have is named “init.pkr.hcl”. This file contains the plugins I am using in Packer. In this demo, I am using an Azure plugin and a Windows updates plugin so that my image will be up-to-date after my Packer build process.
packer {
  required_plugins {
    windows-update = {
      version = "0.15.0"
      source = "github.com/rgl/windows-update"
    }
    azure = {
      version = ">= 2.0.4"
      source  = "github.com/hashicorp/azure"
    }
  }
}
Next, I have “locals.pkr.hcl”, which, like Terraform, contains all the local lookups I will use in the deployment. In this build process, I create the image versioning from today’s date and save it as a local variable.
locals {
  image_version = formatdate("YYYYMMDD.hh.mm", timestamp())
  tags = {
    Environment = "Production"
    Owner       = "Martin"
  }
}
Then, I have the “variables.pkr.hcl” file, which, again, like Terraform, will contain some variables, making it easier to reuse my Packer build file. Remember to insert your subscription ID, tenant ID, client ID, and client secret from your environment.
variable "resource_group_name" {
  description = "The name of the resource group in which the resources will be created."
  default     = "rg-automated-image-build"
}
variable "location" {
  description = "The Azure region in which the resources will be created."
  default     = "WestEurope"
}
variable "subscription_id" {
  description = "The subscription ID where the resources are located."
}
variable "gallery_name" {
  description = "The name of the gallery."
  default     = "gal_automated_image_build"
}
variable "image_name" {
  description = "The name of the image."
  default     = "w11_demo"
}
variable "tenant_id" {
  description = "The tenant id of my environment."
}
variable "client_id" {
  description = "The client id of the app registration."
}
variable "client_secret" {
  description = "The client secret for the app registration."
}
The final file in my Packer deployment is called “main.pkr.hcl,” you guessed it; it contains the resources I will deploy with Packer. This file has two sections, one named “source” and the other called “build.” The source part is where I define the image I want to deploy and where I will capture it, and the build section describes what I want to do with the image. I added my software installation, Windows update, and Sysprep steps in the build section. I added comments inside the file to make it easy to understand what I am doing in this Packer build.
source "azure-arm" "image" {
  # This section defines my authentication to Azure
  client_id       = var.client_id
  client_secret   = var.client_secret
  subscription_id = var.subscription_id
  tenant_id       = var.tenant_id

  # This section defines where I want to place my image after the build is complete.
  shared_image_gallery_destination {
    subscription = var.subscription_id
    resource_group = var.resource_group_name
    gallery_name = var.gallery_name
    image_name = var.image_name
    image_version = local.image_version
    replication_regions = ["${var.location}"]
    storage_account_type = "Standard_LRS"
  }

  # This section defines the source image that I want to use to build my image, and also how to connect to the VM to run the build.
  build_resource_group_name = var.resource_group_name
  os_type                   = "Windows"
  image_publisher           =  "microsoftwindowsdesktop"
  image_offer               = "office-365"
  image_sku                 = "win11-23h2-avd-m365"
  vm_size                   = "Standard_D4s_v5"
  communicator              = "winrm"
  winrm_insecure            = true
  winrm_timeout             = "5m"
  winrm_use_ssl             = true
  winrm_username            = "packer"
  azure_tags                = local.tags
}

build {
  # Here I reference the source that I defined above
  sources = ["source.azure-arm.image"]

  # Here I install the custom software I want in the image
  provisioner "powershell" {
    inline = ["New-Item -ItemType Directory -Path 'c:/Software'",
      "[Net.ServicePointManager]::SecurityProtocol = [Net.SecurityProtocolType]::Tls12",
      "Write-Output 'Installing Visual Studio Code'",
      "Invoke-RestMethod -uri 'https://code.visualstudio.com/sha/download?build=stable&os=win32-x64' -OutFile 'c:/Software/VSCodeSetup-x64-1.87.2.exe'",
      "Start-Process c:/Software/VSCodeSetup-x64-1.87.2.exe -ArgumentList '/VERYSILENT /NORESTART /MERGETASKS=!runcode' -Wait",
      "Write-Output 'Installing Git for Windows'",
      "Invoke-RestMethod -uri 'https://github.com/git-for-windows/git/releases/download/v2.44.0.windows.1/Git-2.44.0-64-bit.exe' -OutFile 'c:/Software/Git-2.44.0-64-bit.exe'",
      "Start-Process c:/Software/Git-2.44.0-64-bit.exe -ArgumentList '/SP- /VERYSILENT /SUPPRESSMSGBOXES /NORESTART' -Wait"
    ]
  }

  # Here I run Windows update
  provisioner "windows-update" {
    search_criteria = "IsInstalled=0"
    filters = [
      "exclude:$_.Title -like '*Preview*'",
      "include:$true",
    ]
    update_limit = 25
  }

  # Here I run sysprep
  provisioner "powershell" {
    inline = ["while ((Get-Service RdAgent).Status -ne 'Running') { Start-Sleep -s 5 }",
     "while ((Get-Service WindowsAzureGuestAgent).Status -ne 'Running') { Start-Sleep -s 5 }",
     "& $env:SystemRoot\\System32\\Sysprep\\Sysprep.exe /oobe /generalize /quiet /quit",
     "while($true) { $imageState = Get-ItemProperty HKLM:\\SOFTWARE\\Microsoft\\Windows\\CurrentVersion\\Setup\\State | Select ImageState; if($imageState.ImageState -ne 'IMAGE_STATE_GENERALIZE_RESEAL_TO_OOBE') { Write-Output $imageState.ImageState; Start-Sleep -s 10  } else { break } }"]
  }
}
To run the build, I run the following commands from the root folder in the repository.
packer init ./Templates/W11
packer build -var 'client_id=INSERT CLIENT ID' -var 'client_secret=INSERT CLIENT SECRET' -var 'subscription_id=INSERT SUBSCRIPTION ID' -var 'tenant_id=INSERT TENANT ID' ./Templates/W11
GitHub Action
I don’t want to run the build on my computer every time, so I created a GitHub Action. Using GitHub Action will also allow others to update the image so we can share that responsibility. With the GitHub Action, I can also schedule an update to occur on a schedule so everything is automated after patch Tuesday, for instance.
Below is the yaml code for the Action.
name: 'Automated-Image-Builder'
on:
  workflow_dispatch:

permissions:
      id-token: write
      contents: read

jobs:
  packer:
    runs-on: ubuntu-latest
    name: Run Packer
    env:
        ### AZURE Client details ###
        ARM_CLIENT_ID: ${{ secrets.ClientID }}
        ARM_SUBSCRIPTION_ID: ${{ secrets.SubscriptionID }}
        ARM_TENANT_ID: ${{ secrets.TenantID }}
        ARM_USE_OIDC: true
    steps:
    - name: Checkout
      uses: actions/checkout@v3

    - name: Setup `packer`
      uses: hashicorp/setup-packer@main
      id: setup
      with:
        version: "latest"

    - name: Run `packer init`
      id: init
      run: "packer init ./Templates/W11"

    - name: Run `packer validate`
      id: validate
      run: "packer validate -var 'client_id=${{ secrets.CLIENTID }}' -var 'client_secret=${{ secrets.CLIENTSECRET }}' -var 'subscription_id=${{ secrets.SUBSCRIPTIONID }}' -var 'tenant_id=${{ secrets.TENANTID }}' ./Templates/W11"

    - name: Run `packer build`
      id: build
      run: "packer build -var 'client_id=${{ secrets.CLIENTID }}' -var 'client_secret=${{ secrets.CLIENTSECRET }}' -var 'subscription_id=${{ secrets.SUBSCRIPTIONID }}' -var 'tenant_id=${{ secrets.TENANTID }}' ./Templates/W11"
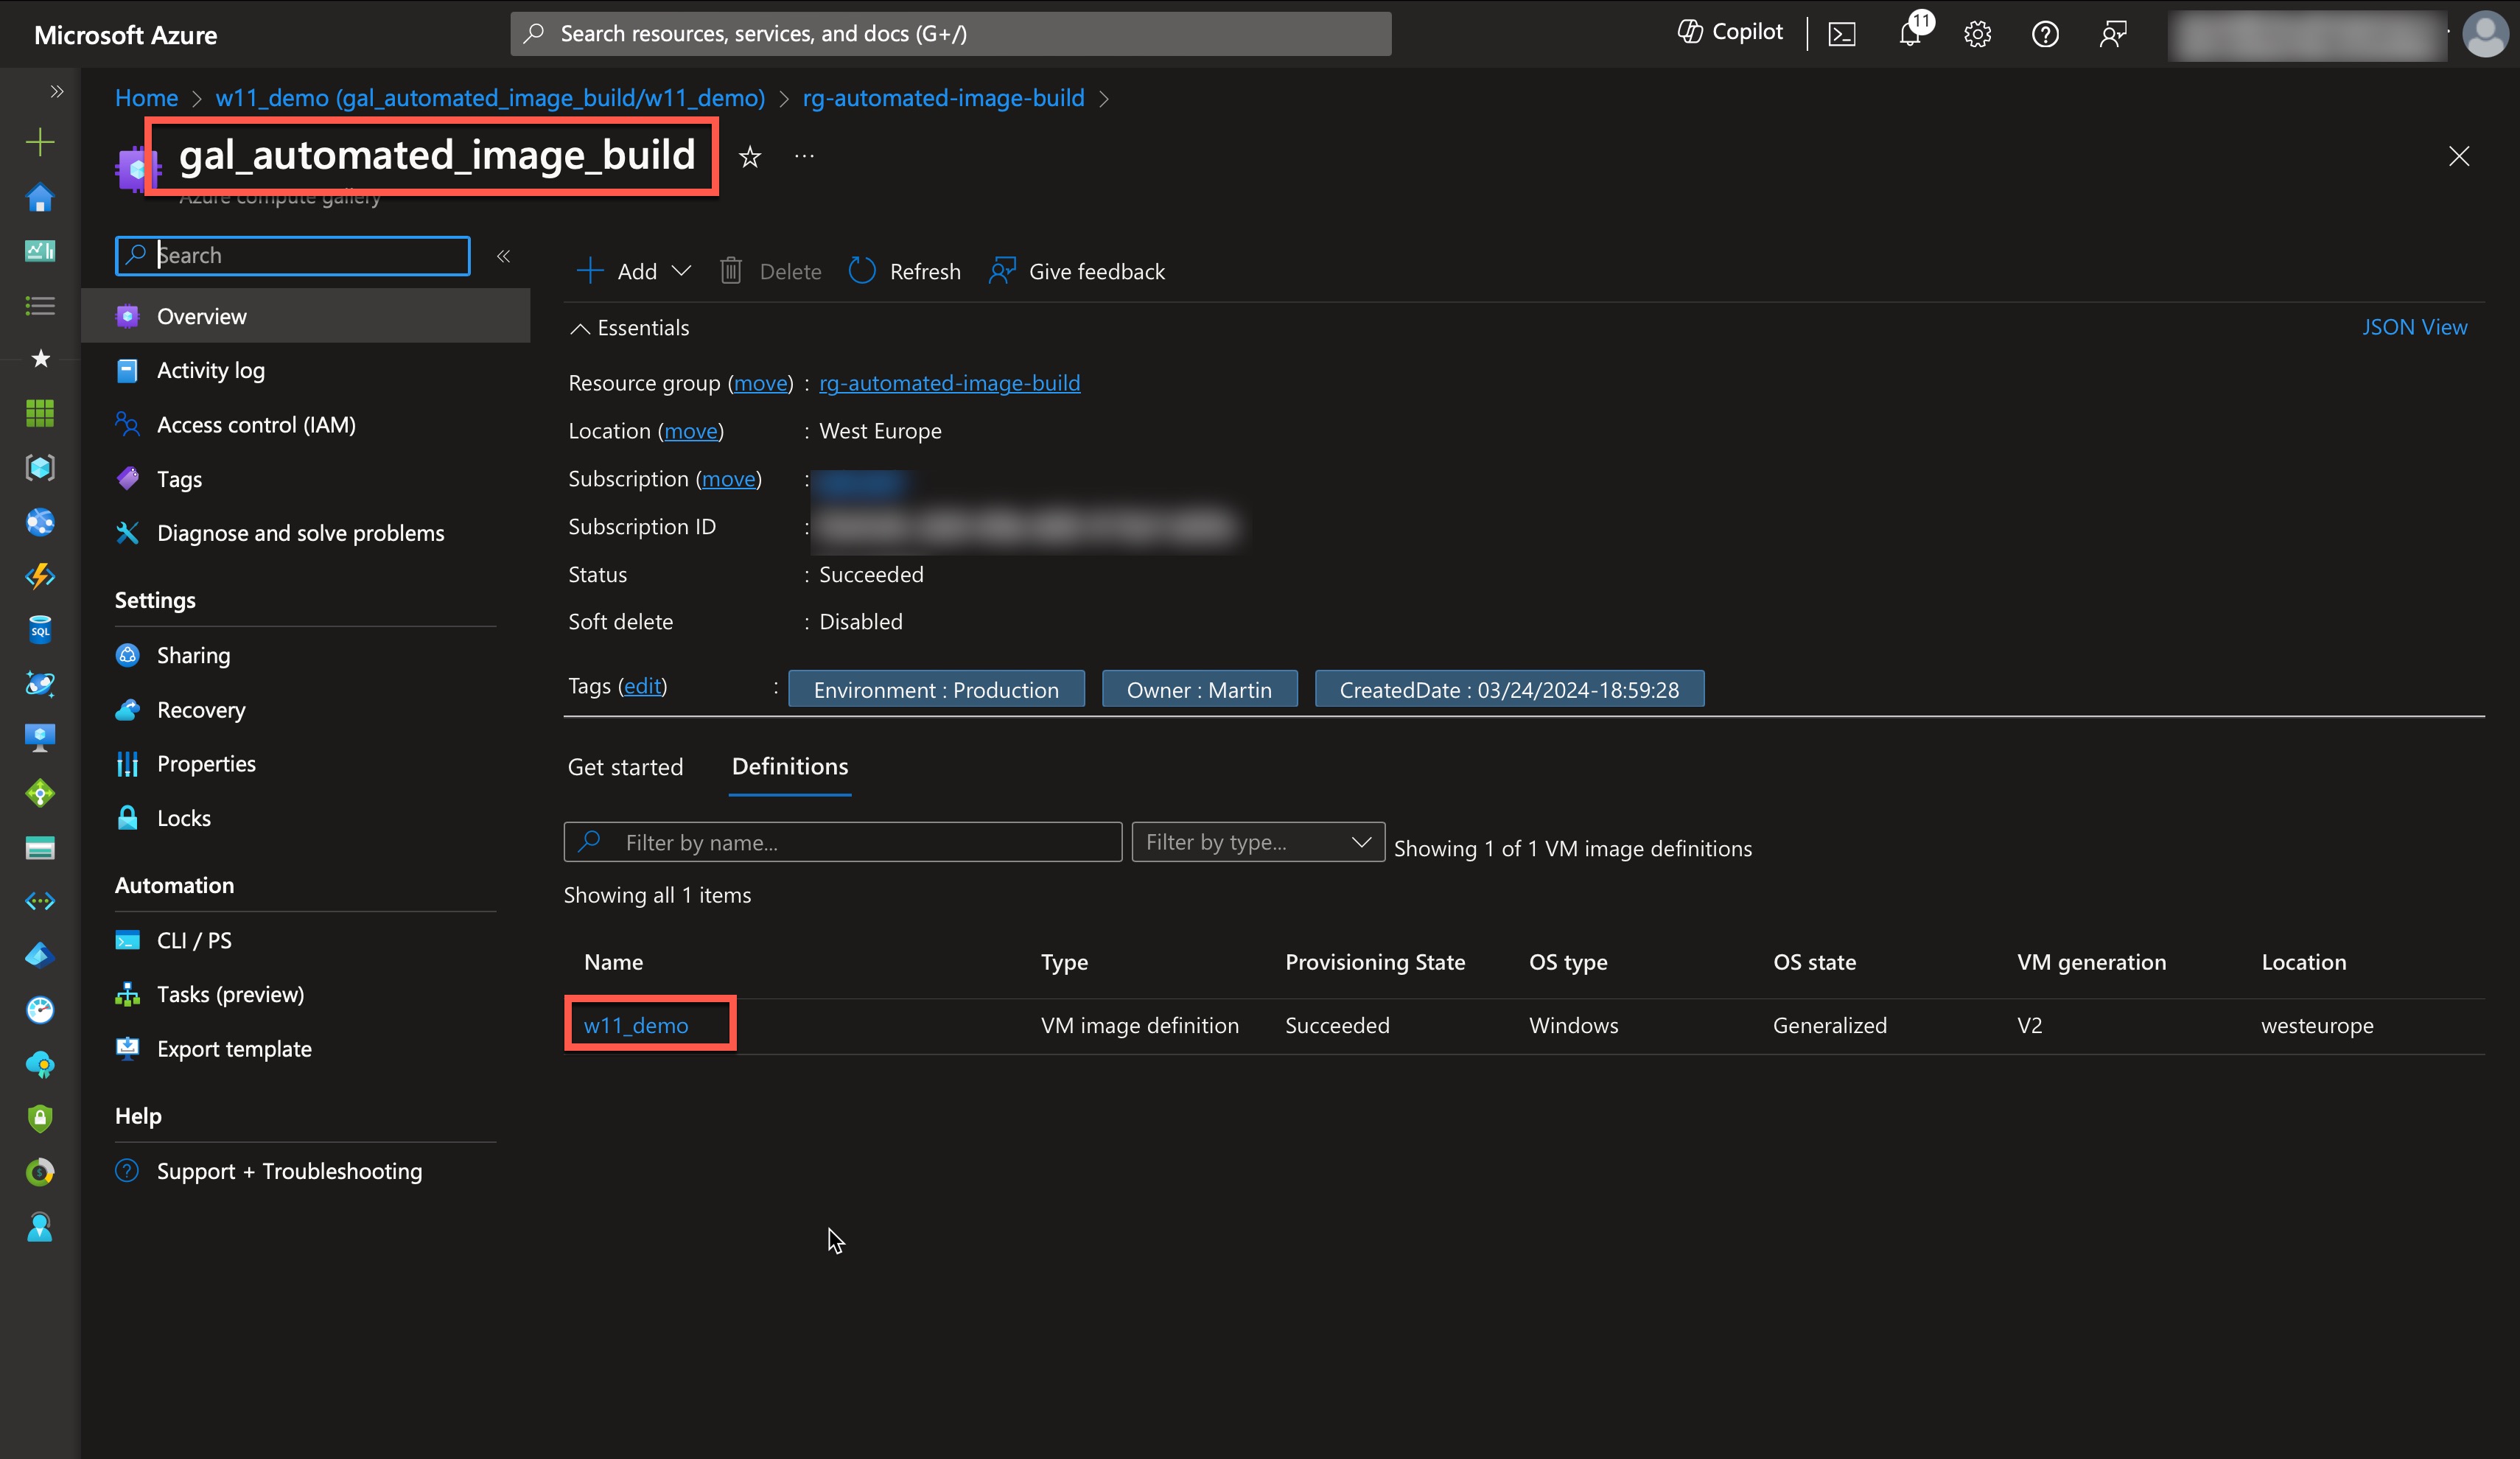
Using the new image
There are multiple purposes for the new image, such as Azure Virtual Desktop, Virtual Machine, and Virtual Machine Scale Sets. I will show you how to create a new virtual machine with the image as the base.
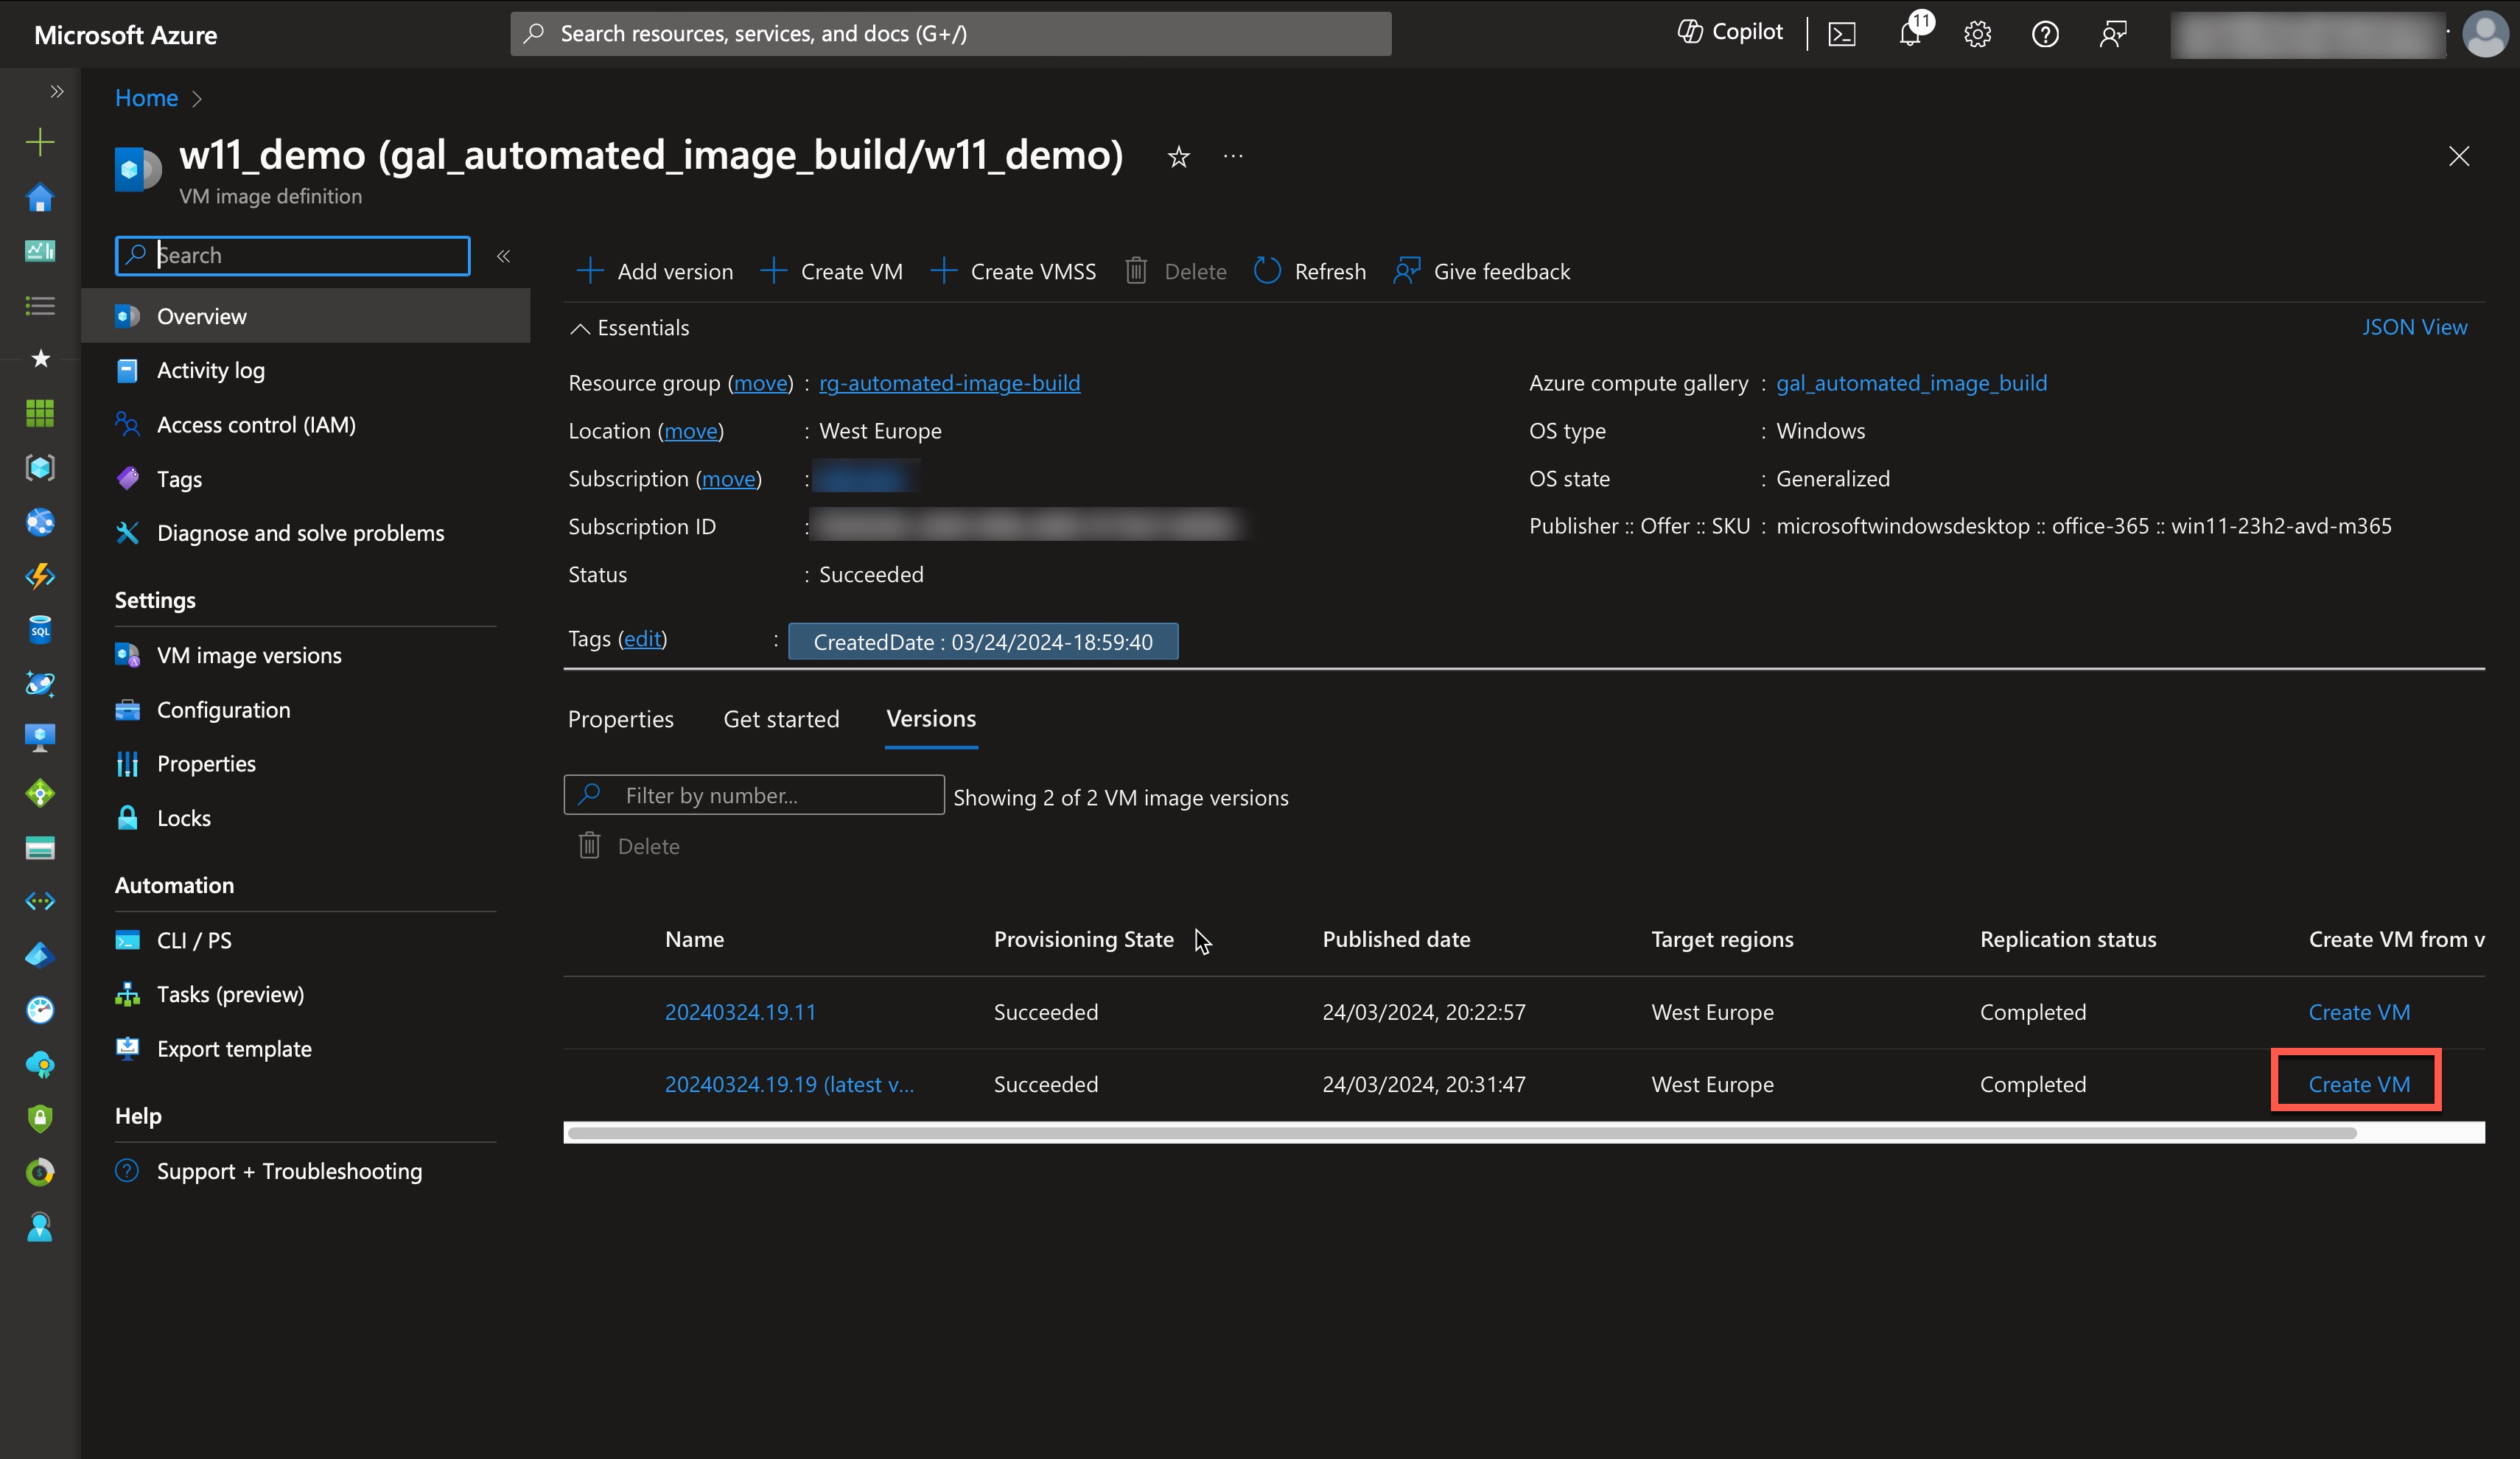
First, navigate to the Azure Compute Gallery and select the image definition called “W11_demo.”
Then, click “Create VM,” and fill out the required fields to fit your environment.
Conclusion
In this short demo, I have shown an easy way to create virtual machine images with custom software and save them in Azure Compute Gallery. With this technology, you can have versions of your image, so if any new software or patch breaks your environment, you can choose an older version to run until a new version is fixed. Scale sets and end-user computing environments like Azure Virtual Desktop, Citrix, and Parallels often use this approach.
All code for this demo is in my GitHub, and you are welcome to use it in your environments without any warranty or guarantee of operability.
I hope this post is helpful. As always, feedback is welcome, so reach out on any of my social media or mail.
Comments