I want to guide you through the initial setup for GitHub Actions and Bicep in this blog series. If you read my last series on Azure and Terraform, I want to do the same deployment, but this time using the tools mentioned. As this is a getting started guide, I will show all the steps I have taken to set up the deployment and reference the sites I have used to find knowledge. I assume that you have a GitHub account or know how to set it up and create a repository. I hope you will join me in this guide, and please provide any feedback you have for me.
Let us get started.
The first thing I need to do is to get my computer set up with the right tools. I am using Visual Studio Code on my Mac, and I will be using Azure CLI and GitHub. To install Visual Studio Code for Mac, follow this link and download and install the version that fits your computer. To install Azure CLI, I have used HomeBrew with the following command to install Python “brew install –build-from-source python@3.8 ” and then “brew update && brew install azure-cli” to install the Azure CLI. I found the Azure CLI instructions here .
With the tools installed, I can now create a new service principal in Azure for my deployments. To create this service principal, I use Azure CLI. First, I log in to Azure with the “az login” command.
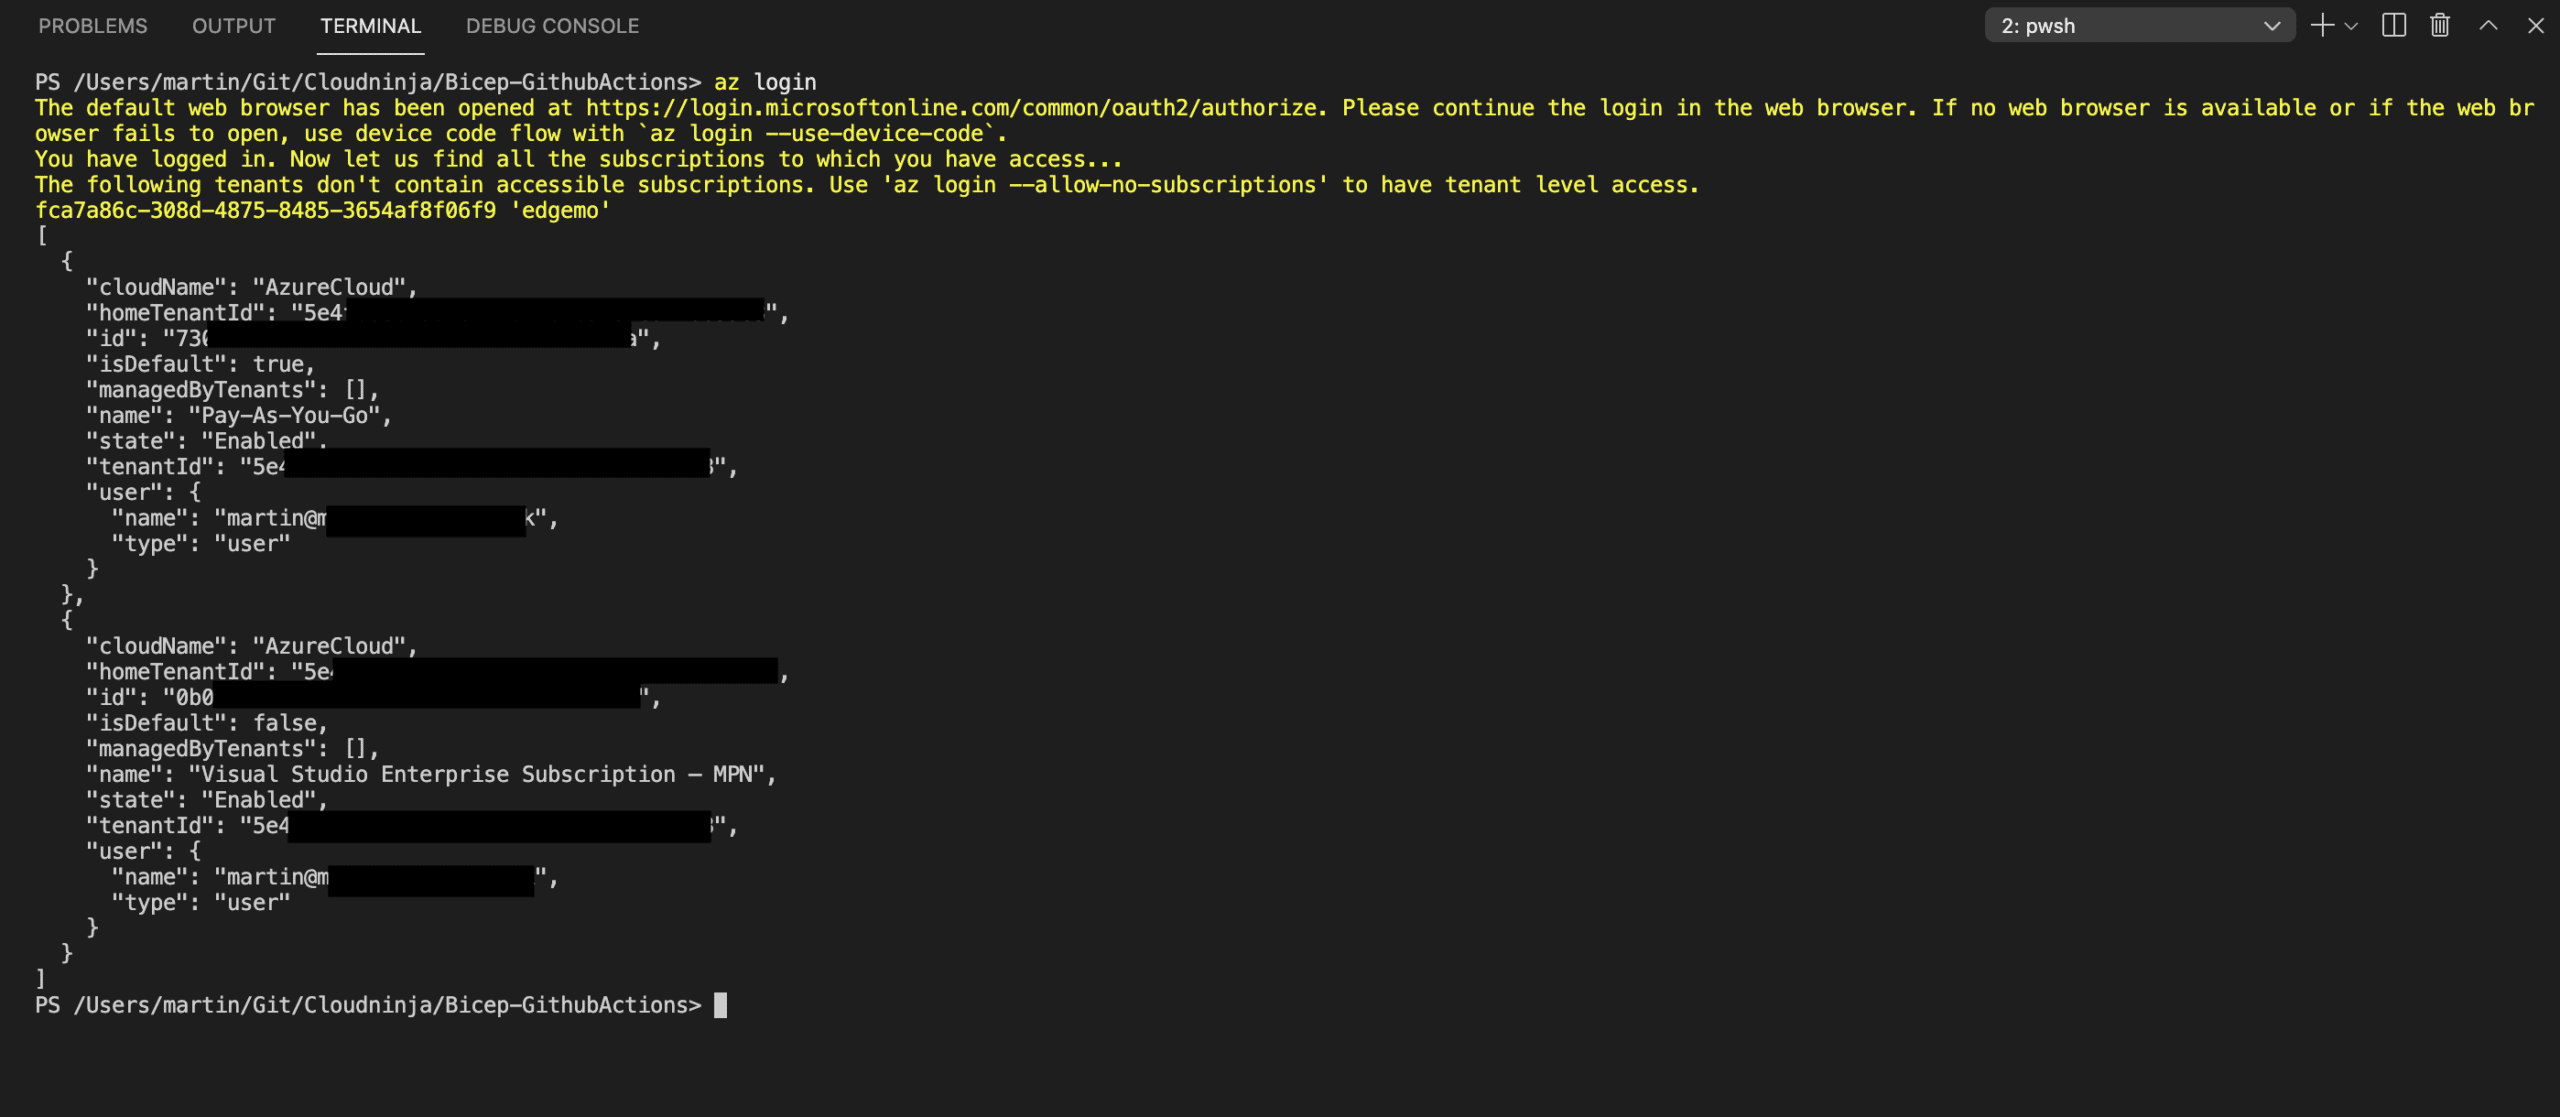
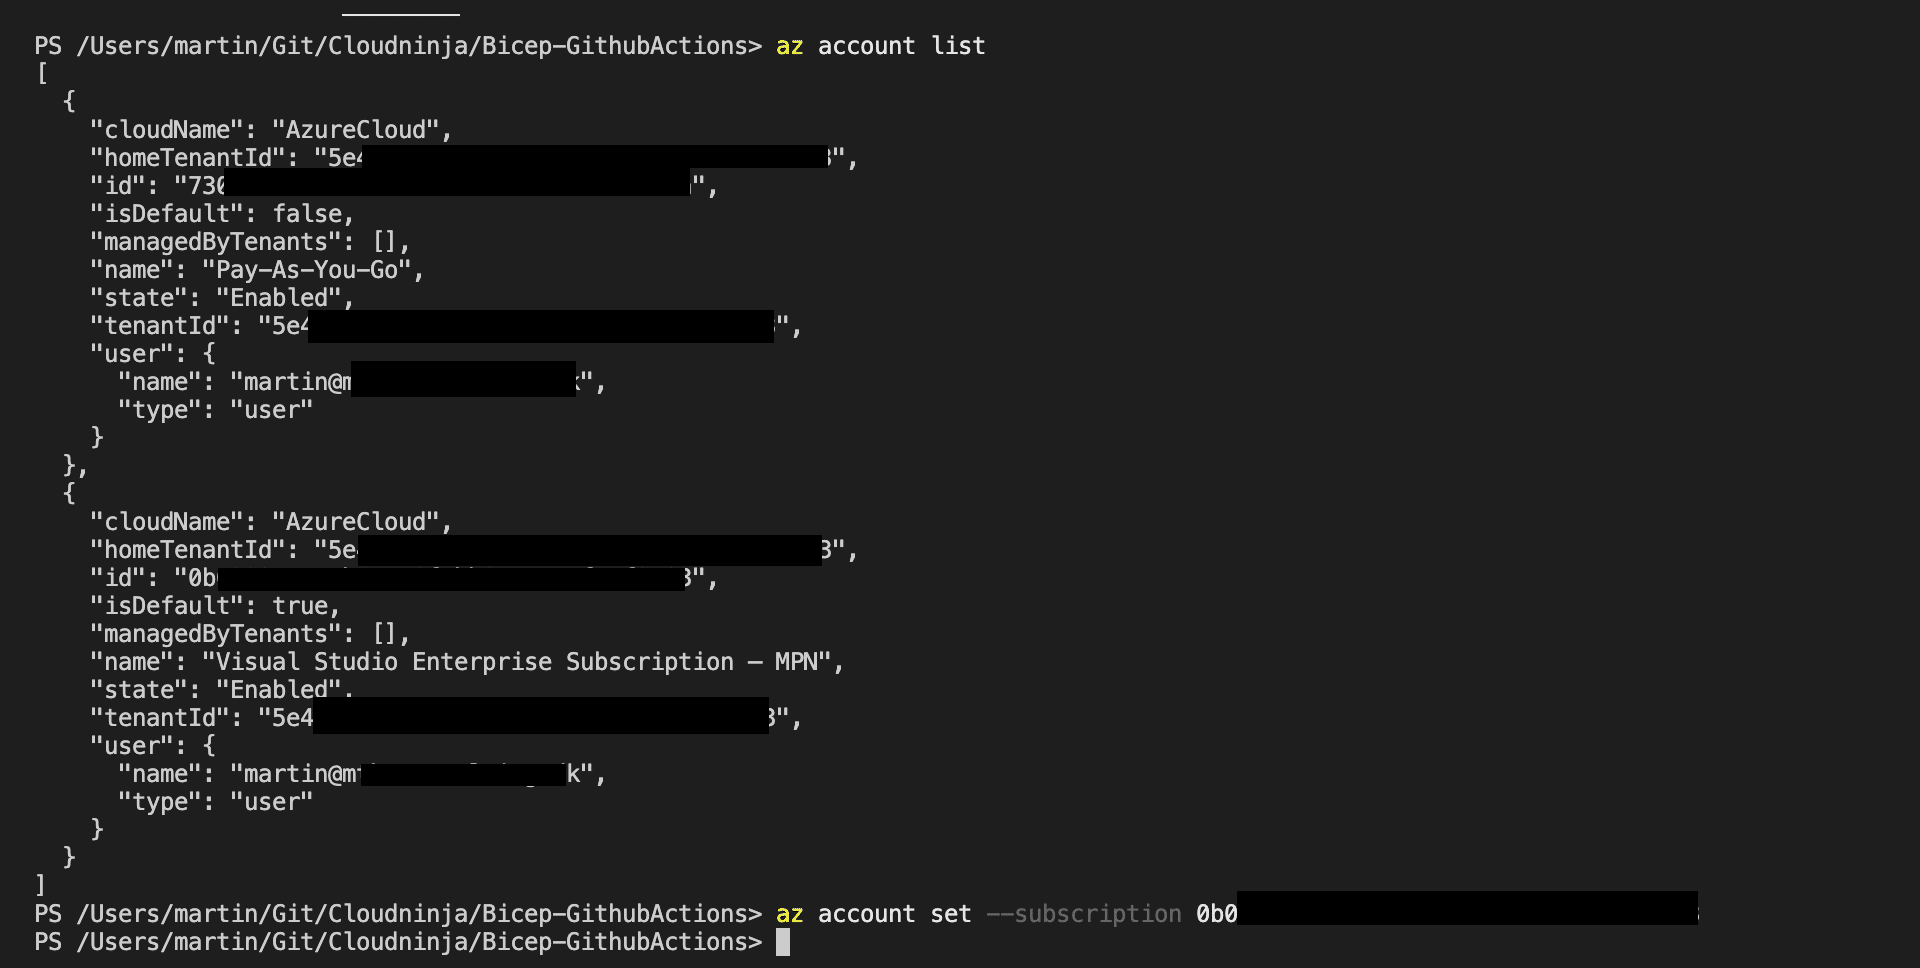
I have more than one subscription in my Azure, so I need to select the one I want to use. I do that by running “Az account list” to list my subscriptions and then “az account set –subscription subscription” to select the correct one.
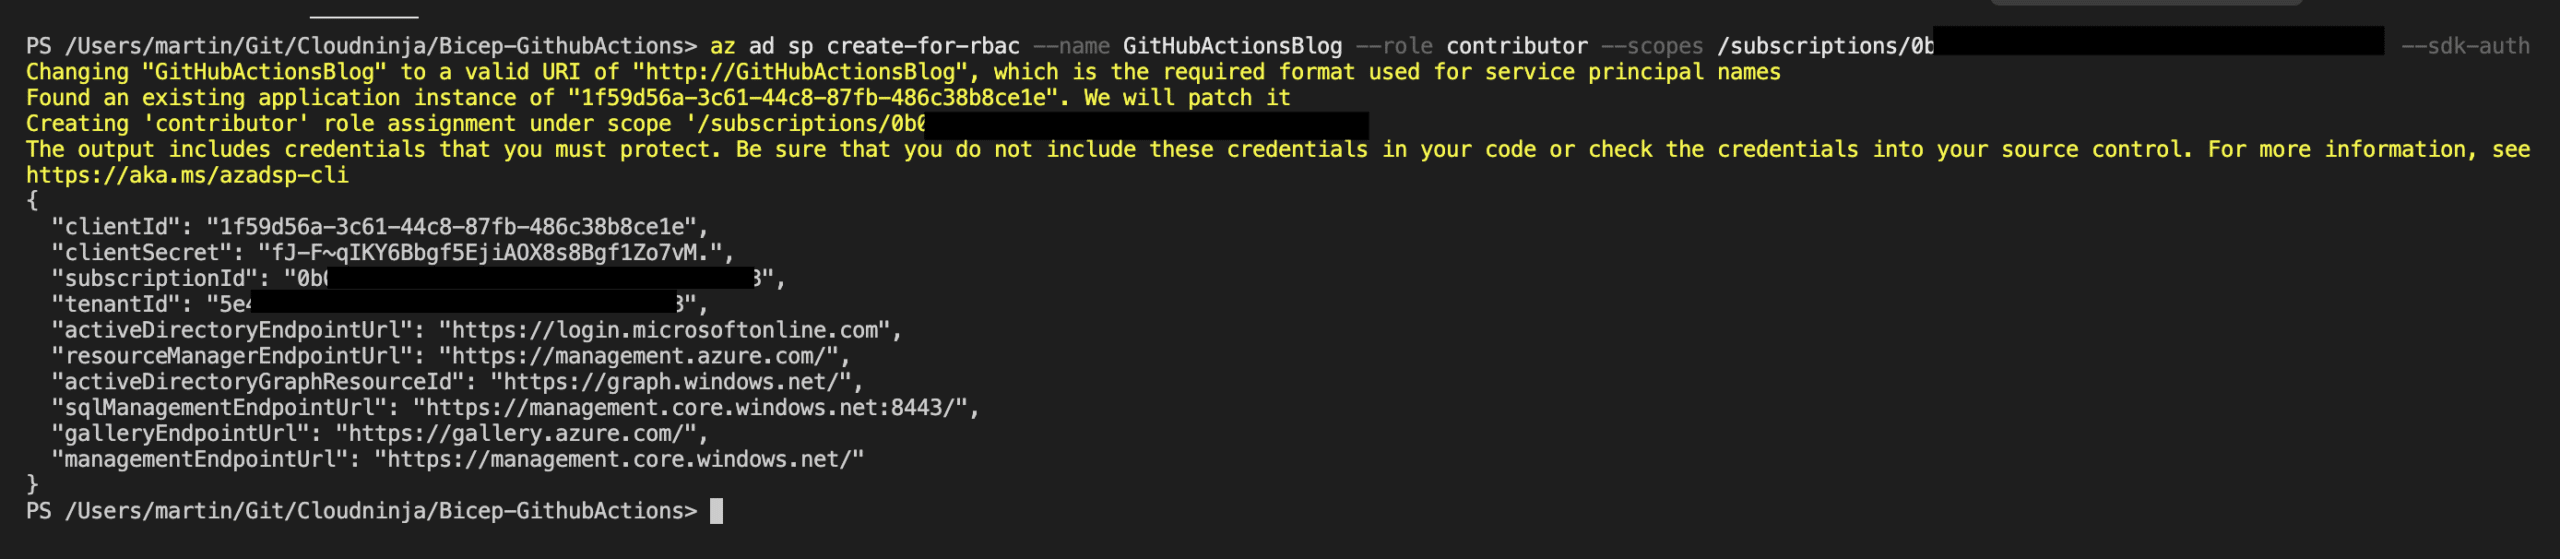
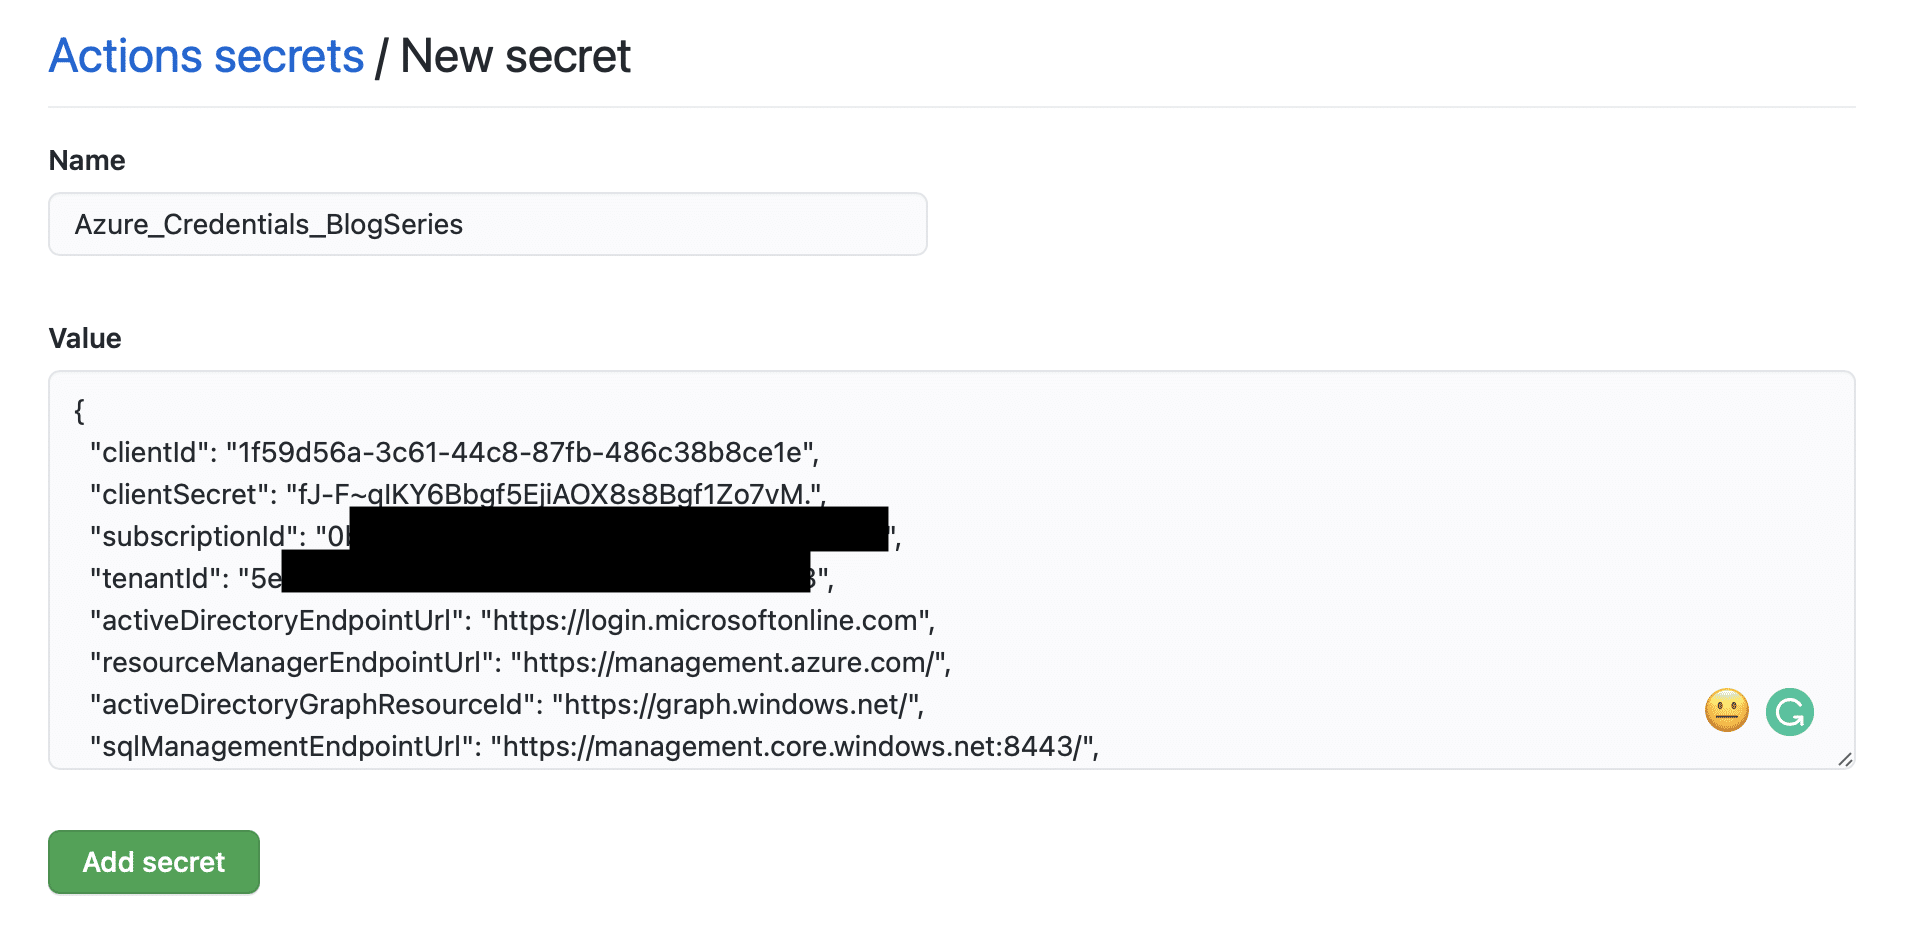
I am now in the right context to create the new service principal in Azure. I will give the new service principal contributor rights on the subscription. I do this because I want to create resource groups, and it is required to have contributor roles on the subscription to perform this. The command for creating this service principal is “az ad sp create-for-rbac –name GitHubActionsBlog –role contributor –scopes /subscriptions/{SubscriptionID} –sdk-auth”. Remember to put in your own subscription id when pasting in the command. Don’t worry about the screenshot showing the client id and secret. I have already deleted the account when this guide is released.
The output from the command is the information I will use to store my secret for my GitHub Actions. I will open the GitHub website and browse to my repository. I have named mine “GithubActionsBlog”.

To create the secret, I click on “Settings” and then on “Secrets”.
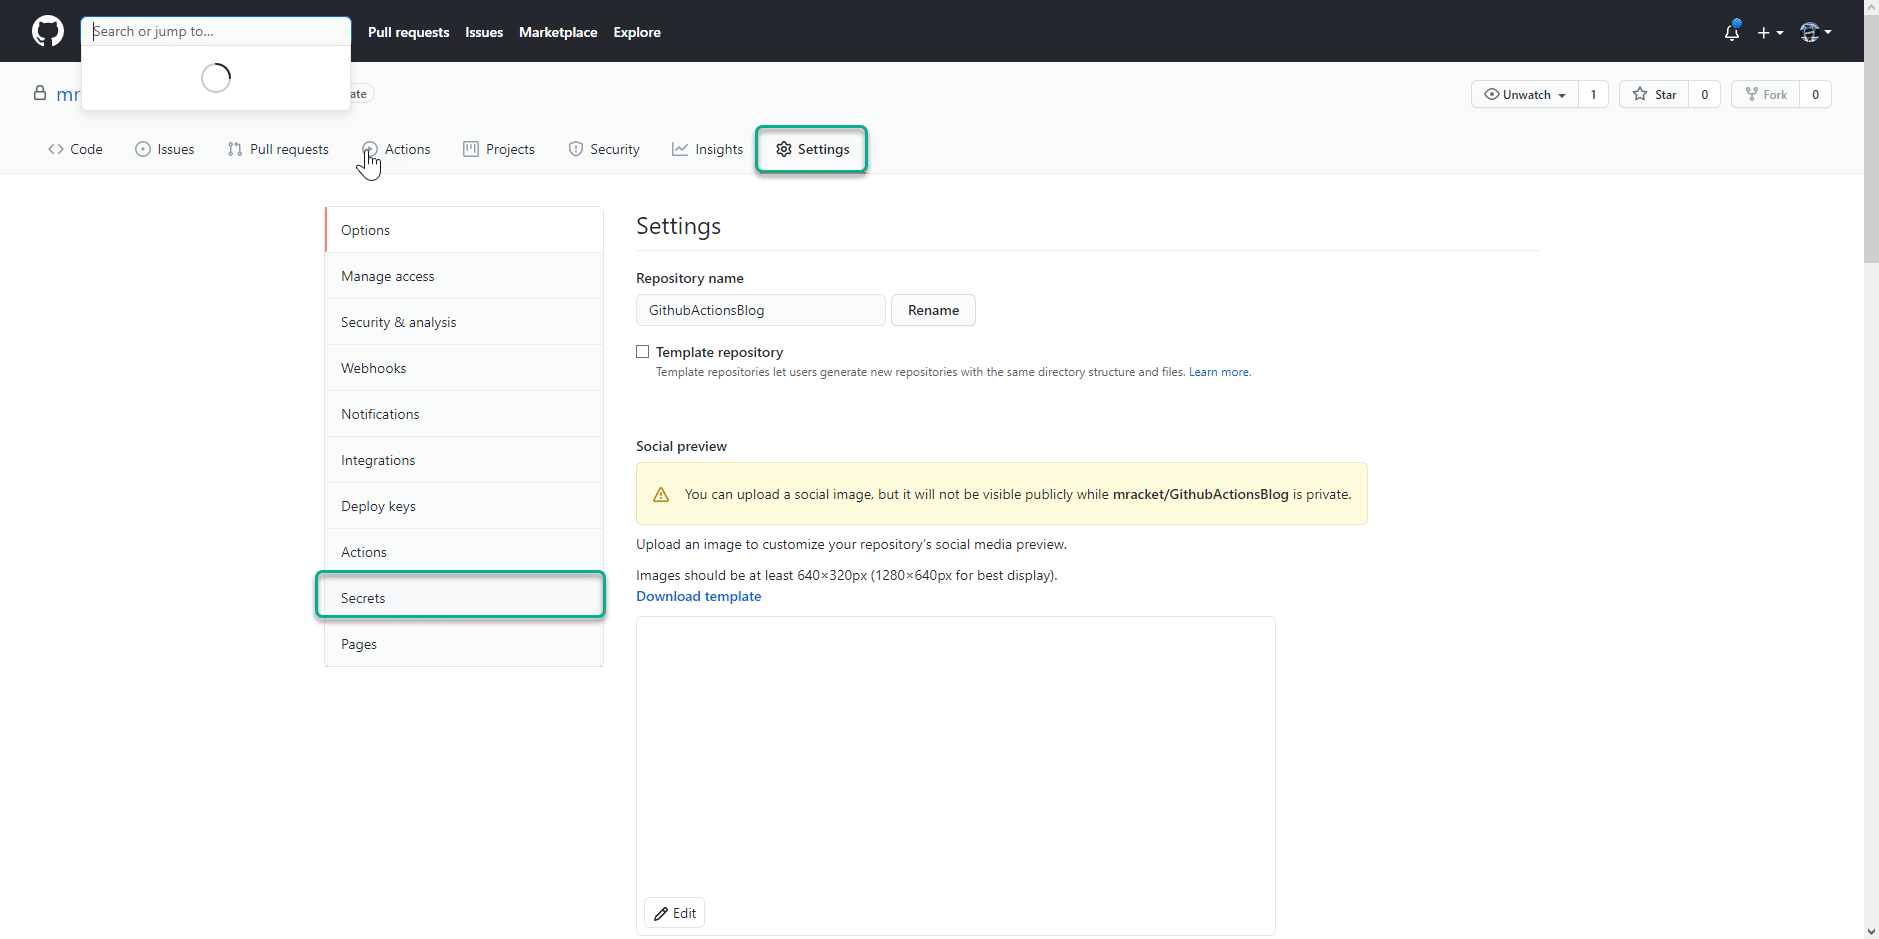
I now click on “New repository secret”.

I named the secret “Azure_Credentials_BlogSeries” and paste in the output from the service principal command.
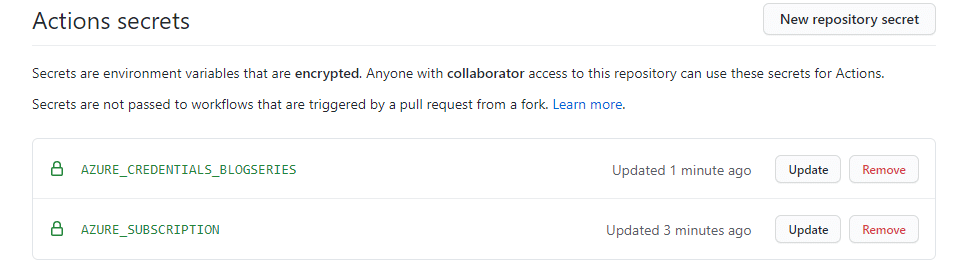
I also added my subscription ID as a secret to ensure that I don’t list these pieces of information in cleartext. So now my secrets look like the picture below.
I think this is a good place to end the first part of the blog series. In the next part, I will be setting up a straightforward Github Action that creates the resource groups I want to deploy my resources.
Stay tuned.
Comments