Intro
In this blog post, I want to show you how to maintain route tables and network security group (NSG) configurations in Azure using Azure DevOps and pipelines. I have already written a post on the NSG part, but I have updated a few things since then, so I want to show that in this post.
You can find all the files in this post in their full length on my GitHub .
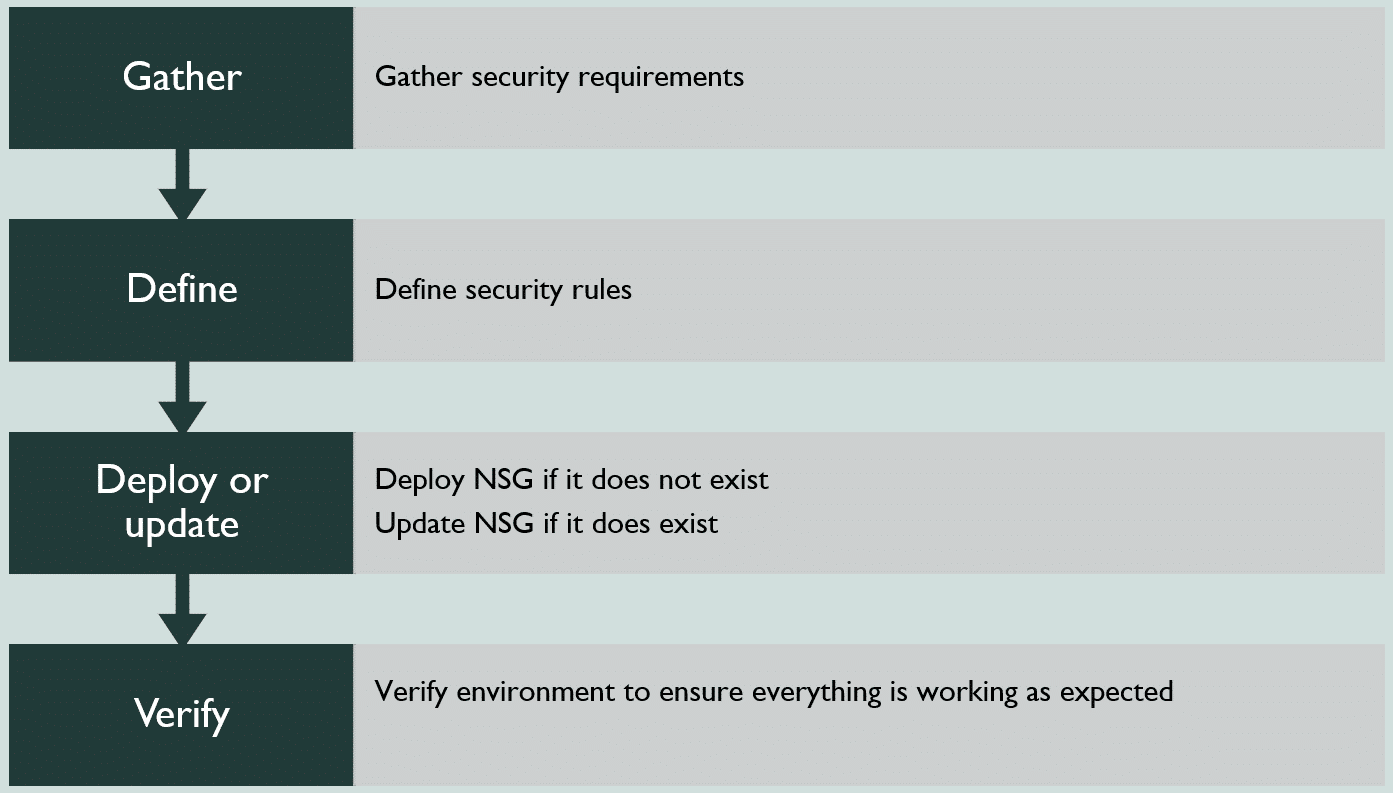
The process surrounding NSG is pretty straightforward. We need to know which requirements we have for security, define our rules and then deploy them to an NSG. If one does not exist, we need to create one. We ensure that lockdowns are in place and that applications are still working as expected when deploying rules.
Route tables are often a default route to a firewall and a few exceptions to allow services to access the internet without going through the firewall.
**Network Security Groups (NSG)
**I have the following requirements for NSG in this demo environment
- Allow RDP to domain services subnet
- Allow RDP to AD connect subnet
- Allow HTTPS to IIS subnet
- Block everything else to all three subnets
Microsoft has documented how to create an NSG with Bicep code here . I have adapted the code to fit my needs, reflecting my Bicep resource file.
param networkSecurityGroups array
param tags object

resource NetworkSecurityGroups 'Microsoft.Network/networkSecurityGroups@2021-03-01' = [for networkSecurityGroup in networkSecurityGroups: {
  name: networkSecurityGroup.name
  location: resourceGroup().location
  properties: {
    securityRules: networkSecurityGroup.rules
  }
  tags: tags
}]
The code above shows two input parameters, and that I am using a for loop to create one or more NSGs. The loop makes the code versatile and reusable on multiple environments without changing anything but the input. The input parameters contain all the information, such as the name of the NSG and the security rules. I have chosen to separate my resource file from the parameter file. By doing this, I need to call my resource file using “module,” as shown below.
module nsg '../Modules/NetworkSecurityGroup.bicep' =  {
  name: 'NSGDeployment'
  scope: resourceGroup(resourceGroupName)
  params: {
    networkSecurityGroups: NetworkSecurityGroups
    tags: tags
  }
  dependsOn: [
    rg
  ]
}
I call the module above, but I still don’t have the values for my NSGs. In the code above, we have a parameter called “networkSecurityGroups” with a value of “NetworkSecurityGroups.” The value is an object defined in the same file. The code below shows an example.
var NetworkSecurityGroups = [
  {
    name: 'nsg-snet-adds-001'
    rules: [
      {
      name: 'rule-deny-all'
      properties: {
        description: 'description'
        protocol: 'Tcp'
        sourcePortRange: '*'
        destinationPortRange: '*'
        sourceAddressPrefix: '*'
        destinationAddressPrefix: '*'
        access: 'Deny'
        priority: 3000
        direction: 'Inbound'
        }
      }
      {
      name: 'rule-allow-rdp'
      properties: {
        description: 'description'
        protocol: 'Tcp'
        sourcePortRange: '*'
        destinationPortRange: '3389'
        sourceAddressPrefix: '*'
        destinationAddressPrefix: '*'
        access: 'Allow'
        priority: 150
        direction: 'Inbound'
        }
      }
      {
        name: 'rule-allow-dns-tcp'
        properties: {
          description: 'description'
          protocol: 'Tcp'
          sourcePortRange: '*'
          destinationPortRange: '53'
          sourceAddressPrefix: '*'
          destinationAddressPrefix: '*'
          access: 'Allow'
          priority: 110
          direction: 'Inbound'
        }
      }
      {
        name: 'rule-allow-dns-udp'
        properties: {
          description: 'description'
          protocol: 'udp'
          sourcePortRange: '*'
          destinationPortRange: '53'
          sourceAddressPrefix: '*'
          destinationAddressPrefix: '*'
          access: 'Allow'
          priority: 115
          direction: 'Inbound'
        }
      }
    ]
  }
]
The code for NSG is simple, and still, it provides excellent versatility and reusability. I can use this code and create an Azure DevOps pipeline for continuous deployment based on code check-in.
Route tables
Another item on the network management part of Azure is route tables. Using route tables ensures that any traffic goes through the firewall. This can be an on-premises firewall or in Azure. You can, of course, access the internet directly from your resources, but the recommendation is to use a firewall to increase security. User-defined route tables are the name Microsoft uses when referring to routes that will impact the resources customers have in Azure. As with the NSGs, Microsoft has documented how to create a routing table in Bicep, have a look here
. I have adapted the code to fit my needs to my module look like this.
param routeTables array
param tags object

resource routeTablename_resource 'Microsoft.Network/routeTables@2020-03-01' = [for routeTable in routeTables: {
  name: routeTable.name
  location: resourceGroup().location
  properties: {
    disableBgpRoutePropagation: true
    routes: routeTable.routes
  }
  tags: tags
}]
Like the NSG code, I have a loop in the code above, and it receives two inputs from my main file. The route tables come from an array, and I have my tags provided as a parameter. Below is the code I use to call the resource above.
module routes '../Modules/Route.bicep' =  {
  name: 'routes'
  scope: resourceGroup(resourceGroupName)
  params: {
    routeTables: routeTables
    tags: tags
  }
  dependsOn: [
    rg
  ]
}
The final part of creating the route tables is to make the variable containing all the values for routes. For each route, I define a name and one or more routes having an address prefix and a next hop for the route to use. Below is an example of one of the routes I use in this blog post.
var routeTables = [
  {
    name: 'rt-avd-routes'
    routes: [
      {
        name: 'udr-forcedtunneling-001'
        properties: {
          addressPrefix: '0.0.0.0/0'
          nextHopType: 'VirtualNetworkGateway'
        }
      }
      {
        name: 'udr-cloudninjawebiste-001'
        properties: {
          addressPrefix: '185.20.205.57/32'
          nextHopType: 'Internet'
        }
      }
    ]
  }
]
Pipeline
To tie these two subjects into a deployment, I am using Azure DevOps pipelines. I will be using a simple YAML pipeline to verify my template and then deploy it to Azure. I have written several posts on creating these pipelines, so I won’t be doing it again here, but the code I use for my pipeline is below.
trigger:
- main

pool:
  vmImage: ubuntu-latest

variables:
  azureServiceConnection: 'Cloudninja Azure-AzureNetwork-Blogpost'
  resourceGroupName: 'rg-nsg-demo-001'
  location: 'WestEurope'
  templateFile: 'Deployments/main.bicep'

steps:
- task: AzureCLI@2
  displayName: 'Validate NSG and route tables'
  inputs:
    azureSubscription: $(azureServiceConnection)
    scriptType: 'bash'
    scriptLocation: 'inlineScript'
    inlineScript: az deployment sub validate --template-file $(templateFile) --location $(location)

- task: AzureCLI@2
  displayName: 'Deploy NSG and route tables'
  inputs:
    azureSubscription: $(azureServiceConnection)
    scriptType: 'bash'
    scriptLocation: 'inlineScript'
    inlineScript: az deployment sub create --template-file $(templateFile) --location $(location)
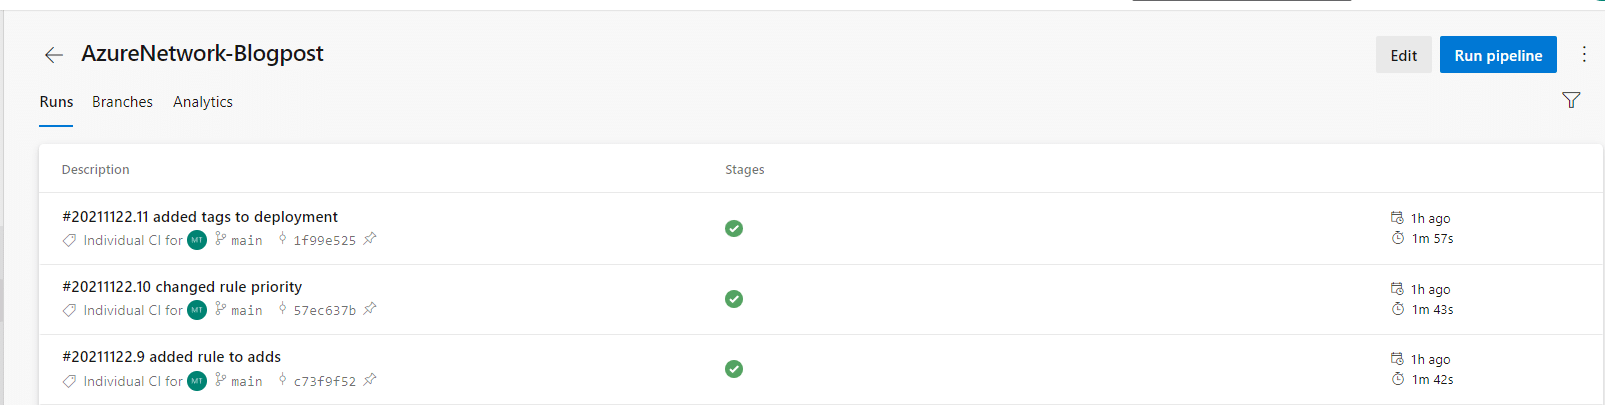
With the pipeline above, I can edit my NSG rules and routes in VS code, and when I commit my changes to the main branch, it will update my Azure environment. Using pipelines enables me to work in a pleasant developer environment and have the confidence to update rules and deploy them into production any time I feel like it. Below is a snippet of some of the commits I have done on my repository. Just reading the comments provides information I can use to see figure out what was changed.
I hope this post was informative and will help you out when creating your infrastructure as code. Reach out to me on Twitter or this website if you have any feedback or questions for the post.
Comments